


 Developers
 Play Console
Android P is the next big release for the Android platform and it includes
some behavior changes that affect all apps,
regardless of what version you set for the
targetSdkVersion.
To ensure your app looks and behaves its best on Android P, follow the instructions on this page to build and run your app with the Android P Preview SDK.
Get Android Studio 3.1 or higher
The Android P Preview SDK includes changes that are not compatible with Android Studio 3.0.
You can compile and test Android P apps using Android Studio 3.1, but some users of the Android P Preview SDK may encounter Gradle sync failures and additions of out-dated dependencies with Android Studio 3.1.
For the best development experience with the Android P Preview SDK, we recommend that you install the latest Android Studio 3.2 canary.
You can keep your existing version of Android Studio installed, because you can install multiple versions side by side.
Get the Android P Preview SDK
After you install and open Android Studio 3.2, install the Android P Preview SDK as follows:
- Click Tools > SDK Manager.
- In the SDK Platforms tab, select Android P Preview.
- In the SDK Tools tab, select Android SDK Build-Tools 28-rc1 (or higher).
- Click OK to begin install.
Update your build configuration
To fully test your app's compatibility with Android P and begin using new APIs,
open your module-level build.gradle file and update the
compileSdkVersion and targetSdkVersion as shown here:
android {
    compileSdkVersion 'android-P'

    defaultConfig {
        targetSdkVersion 'P'
    }
    ...
}
To learn about the changes in Android P that might affect your app and begin testing them, read Android P Behavior Changes.
To learn more about new APIs available in Android P, read Android P Features and APIs.
Run Android P in the emulator
Although you can install Android P on a Pixel device, running Android P on the Android Emulator is fast and convenient, and it allows you to emulate any handset or tablet device.
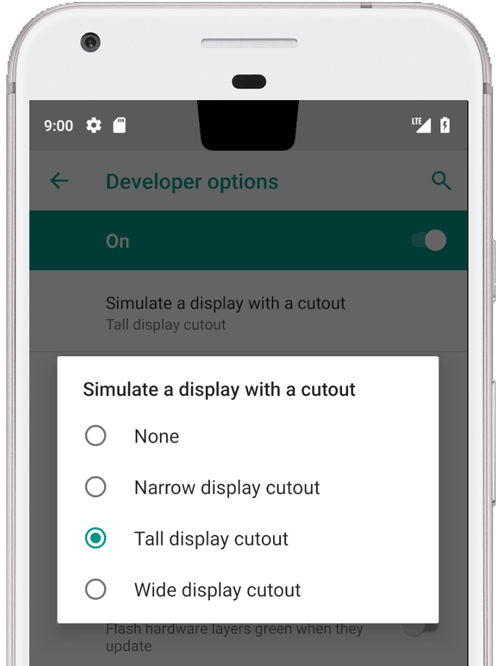
Figure 1. Emulator with simulated display cutout
To run Android P in the emulator, install the latest system image and create a new virtual device as follows:
- In Android Studio 3.2, click Tools > SDK Manager.
- In the SDK Platforms tab, select Show Package Details at the bottom of the window.
- Below Android P Preview, select a system image such as Google APIs Intel x86 Atom System Image.
- In the SDK Tools tab, select the latest version of Android Emulator (27.1.12 or higher).
- Click OK to begin install.
-
After install is finished, select Tools > AVD Manager and follow the instructions to create a new AVD.
Be sure to select a device definition that does not include Play Store, and select P for the system image.
-
When you return to the AVD Manager's list of virtual devices, double-click your new virtual device to launch it.
Be sure to try your app with screen cutouts that make space for the ear speaker and/or camera, as shown in figure 1. You can simulate a screen cutout as follows:
- Enable developer options.
- In the Developer options screen, scroll down to the Drawing section and select Simulate a display with a cutout.
- Select the size of the cutout.
If you'd like to optimize your UI based on the size and position of the cutout, new APIs are available in P to help you add support for display cutouts.

